I logged in and saw an urgent email! 📮
It was from the Managing Director of a Research Center I consult.
The request was simple:
Who could animate individual molecules joining a polymer network?
I joyfully replied, "I could do it!"
(Wisely) I was asked to provide 3️⃣ examples of molecular animations I'd created.
Confidently, I agreed to create and send these by the end of the month.
But, after sharing a list of colleagues with experience in molecular animation, I set off to learn the skill.
It took 2 months to create a 1, 17-second animation.
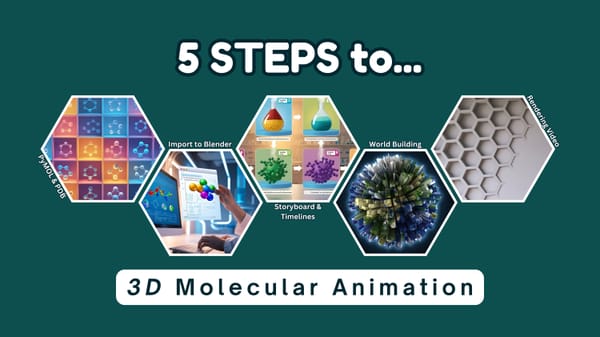
But! I think I can shorten the process for others by sharing a step-by-step recreation guide and a bit about what I learned from the experience:
Fellow Visualizers of the Abstract (Chemists),
I animated the dehydration synthesis of maltose in 3D. Here's how:
Tools & Directions
I wrote out my methods step-by-step so that one might recreate what I did which could be revised to animate most chemical reactions:
The Software
- PyMOL (Free for Educational Licensing): PyMOL is a popular molecular visualization software used for modeling and visualizing 3D structures of biomolecules, such as proteins, DNA, RNA, and small molecules. However, PyMOL has limited options for exporting structures and does not preserve color information when exporting.
- Blender (Free): Blender is a free, open-source, and highly capable 3D modeling and animation software. It is not specifically designed for molecular visualization but can be used for that purpose with the help of add-ons like BlendMol.
- Atomic Blender (Free): Atomic Blender is a Blender add-on that bridges the gap between molecular visualization software (VMD and PyMOL) and Blender. It allows users to easily import Protein Data Bank (PDB) and VMD Visualization State files and PyMOL Session files directly into Blender.
Creating the dehydration synthesis animation
Step 1: Preparing the Glucose Monomers in PyMOL
⚠️ Before you do anything, confirm the configuration of the molecule you want to animate:
When creating molecular animations, it's crucial to use the correct configuration of the molecule for the given context.
In this example, we will animate glucose in an aqueous solution. As a result, the open-chain representation is inaccurate as glucose primarily exists in its cyclic pyranose form. Furthermore, the β-D-glucopyranose form is more stable than the α-D-glucopyranose form in aqueous solution due to the anomeric effect being diminished for the α-anomer in water and other polar solvents.
Always research the most relevant and abundant form of the molecule in the specific environment you are depicting to ensure your animation is accurate and educational.
When fetching structures in PyMOL, you need to use the correct PDB code:
- Navigate to the Search bar at the top of the RCSB Protein Data Bank (PDB) website: https://www.rcsb.org/.
- Enter relevant keywords related to your structure of interest. This could be the protein name, organism, ligand, chemical name, etc. For example, I would enter
beta-D-glucopyranosefor this animation. - Click the dropdown “Tabular Report” and select “Ligand.”
- From the search results, click on a structure to view its summary page. The PDB code will be prominently displayed at the top. For example, the code for beta-D-glucopyranose is
BGChttps://www.rcsb.org/ligand/BGC.
Next, fetch and export the molecule using PyMOL
- Open PyMOL and load the molecule by using the "fetch" command. The fetch command for β-D-glucopyranose is
fetch BGC. - Export the structure as a PDB file: “Export Structure” > “Export Molecule” > Save > name your structure and change the dropdown to PDB.
- Now, locate your PDB file and open it in a text editor and delete all the rows starting with “CONECT” (this gets rid of small discs used to represent bonds between the atoms).
- Save the file.
Step 2: Importing the Glucose Monomers into Blender
Enable the Atomic Blender Add-On
- Open Blender and start a new project.
- Blender projects start with a cube as a sort of “Hello, World” situation. You can delete the cube by going to the “Scene Collection” panel on the right, right click “Cube” and select “Delete Hierarchy”.
- Ensure “Atomic Blender” is enabled by navigating to “Edit” > “Preferences” > “Add-ons” > and searching “Atomic” or “PDB.”
- If it’s not available, then you can navigate to “Get Extensions” and download “Atomic Blender PDB/XYZ” from there.
- Once it’s available in “Add-ons”, enable it by checking all the boxes (including the “Utility panel”).
Import and prepare the residues
- Now, go to "File" > "Import" > "Protein Data Bank (.pdb)" and select your file.
- Once the structure is in Blender, use “control” + “A” and select “Make Instances Real.”
- The atoms will look fuzzy because there’s been duplicates made to ensure they are individual objects.
- To get ride of the duplicates you can select the object in the Scene Collection panel (right click and “select objects”) to change the:
- Location or ”G,”
- Rotation or “R” (it’ll fix a plane for you if you click it once and allow for 360º rotation if you type “R” again), and
- Scale or “S.”
- You can use these keys to move the duplicates out of the way one-by-one to clean up the structure.
- I also prefer to go in and name the carbons C1, C2, C3, etc., the oxygens O-C1, O-C2, Ether, etc., and I don’t bother naming the hydrogens.
- Undo the the dropdowns in the right panel, select the atoms of your structure holding the control button and push “G” to move the molecule elsewhere. You’ll see these vertices drop out. Scroll over and click to select these and delete them.
- Delete the three “oxygen_ball,” “hydrogen_ball,” and “carbon_ball” from the collection panel.
- Give the molecule a handle:We’re about to animate the whole molecule and individual atoms, so let’s give all these atoms a handle to rotate when we want to animate the movement of the entire molecule in unison.
- Create an Empty object:
- Press Shift+A in the 3D viewport
- Choose Empty > Plain Axes
- Parent all atom objects to the Empty:
- Select all your atom objects
- Then select the Empty object last (it should be highlighted in yellow)
- Press Ctrl+P and choose "Object (Keep Transform)"
- Create an Empty object:
- For the purposes of our animation, we want two monomers of BGC. So right click the collection “BGC.pdb” and select “Duplicate Collection.” (Check for extra atoms)
- They will import directly on top of one another, you can select one at a time and move them using the keys we mentioned earlier (G and R).
- I prefer to name them differently, just to keep them organized. So, I named one
ElectrophilicBGCand the otherNucleophilicBGC.
Highlight the atoms involved in the reaction.
📝 There are 24 atoms in BCG, however, only 4 atoms are involved in the reaction:
- O-C4 of the nucleophilic residue forms a bond with the electrophilic anomeric carbon in C1-OH of the other residue and breaks a bond with it’s hydrogen).
- H-OC4 of the nucleophilic residue breaks a bond with oxygen to form a bond with the -OH once bound to the C1* on the other residue forming water.
- C1* of the electrophilic residue breaks a bond to -OH, a good leaving group in solution, and forms a bond with the nucleophilic oxygen of C4-OH on the other residue.
- O-C1 of the electrophilic residue breaks a bond with C1* and forms a bond with the the hydrogen in C4-OH on the other residue forming water.
To make the reaction easier to visualize, I recommend highlighting these four atoms.
- To highlight an atom, select one and look to the bottom right panel (Data → Properties).
- Change the material link from data to object (square with brackets around it to the right of the material name).
- You’ll need to create a new material to place onto the object: click + and name the material something else (I named mine
Element*). - Then, use the dials to change the material’s properties (I tried just changing the Metallic setting to 0.65, I made two separate materials for the Oxygen atoms ← this helps later with animation).
- Repeat for the other atoms you want to highlight.
📣 Now, you’re ready to animate!
Step 3: Animating the Reaction in Blender
Lights, Camera…
First, set up the lighting and camera to clearly show the molecules and the reaction site.
You can select each in the Scene Collection panel and toggle to camera view by clicking either the camera icon on the left of the Object Mode panel or by pressing “0.”
Scene #1: Showing the Glucose Monomers, side-by-side.
📝 I recommend starting by showing the monomers in the same orientation side-by-side to establish that they are in fact, monomers.
- One at a time, use “G” and “R” to arrange the glucose monomers side-by-side with the nucleophilic monomer on the left and the electrophilic monomer on the right.
- Switch the bottom panel to Timeline by clicking the ball icon, navigate to the “Animation” menu, and select “Timeline.”
- Make sure the current frame is set to 1. You can confirm this by the blue line and number.
- In the Blender 3D Viewport, select what you want to save by holding down the "Command" key and clicking on each monomer in the Scene Collection panel. Then, right click and select “Select Objects.”
- Right click your selection and click “Insert Keyframe with Keying Set” or type “K” and choose “Location, Rotation, & Scale” This sets a starting location, rotation, and scale for the animation.
- You can confirm the keyframe was made by the little yellow diamond on the timeline.
- Now, move the current frame to the next frame by clicking the number (people appear to be working in increments of 30). Confirm that the blue line and text have updated to the desired frame number.
Scene #2: Orient the monomers for the reaction (but with some distance).
- With a little distance, orient the nucleophilic monomer on the left so that one of the lone pairs on the oxygen of the C4-OH could be directed at the C1* of the electrophilic monomer on the side opposite to the C6 ($CH_2OH$) group (beta-face nucleophilic attack).
- Fine-tune the positions and orientations of both monomers:
- If you need to zoom in or out, use the mouse scroll wheel. To pan the view, hold down the middle mouse button and move the mouse.
- To view the scene from different angles, hold down the middle mouse button and rotate the view. You can also use the numpad keys (1, 3, 7) to quickly switch to front, side, and top views, respectively.
- If you want to adjust the position or orientation of the monomers along a specific axis (X, Y, or Z), you can press the corresponding key (X, Y, or Z) after activating the Rotate or Move tool. This will constrain the movement or rotation to that axis.
- Once you're satisfied with the positioning of the glucose monomers, you can save as a new keyframe with location and rotation.
⭐ Once you have 2+ scenes, you can preview the animation by moving the current frame back to frame 1 by clicking on the "|<" arrow in the Timeline panel and pressing the "Spacebar."
📝 If you want to adjust the timing or positions, you can select the keyframes in the Timeline panel by clicking on them and then moving them left or right to change their timing, or adjusting the positions in the 3D Viewport at the corresponding keyframes.
Scene #3: Show the bonds beginning to stretch
📝 What’s happening: the O-C4 oxygen lone pair of the nucleophilic residue shifts electron density (forming a partial positive charge) to C1* of the electrophilic residue (forming a partial negative charge) via beta-nucleophilic attack. As this happens, the C1*-OH bond lengthens and electron density shifts from the C1* carbon (forming a partial positive charge) to the leaving OH (forming a partial negative charge).
- Animate the two glucose molecules moving closer together, with the C4 oxygen approaching the C1 carbon on the beta-face.
- The C4 oxygen has two lone pairs, giving it a bent geometry (sp3 hybridized with two lone pairs).
- As the C4 oxygen approaches the C1 carbon, its geometry starts to change from bent to tetrahedral (sp3 with one lone pair).
- Simultaneously, show the C1-OH bond lengthening and the OH leaving group moving away slightly. The C1 OH has a tetrahedral geometry (sp3 hybridized).
Optional: Add some shading to convey electron transfer. Switch to the “Shading” tab. Here you can add keyframes to the “Base Color” and your Location, Rotation, Scale by hovering over these features and pressing “I.”
Scene #4: Transition state formation
- Morph the geometry to show the C4 oxygen forming a partial bond with the C1 carbon, while the C1-OH bond continues to lengthen.
- The C1 carbon geometry remains tetrahedral, but the bond angles start to distort.
- The leaving OH group geometry changes from bent (sp3 with two lone pairs) to trigonal pyramidal (sp3 with one lone pair).
- Represent the partial charges developed in the transition state by gradually changing the color of the C1 (blue = positive) and leaving OH (red = negative).
- Use fading bond colors or dashed lines to represent the partial bond formation (C4 O—C1) and breaking (C1—OH) in the transition state.
Scene #5: Proton transfer and water formation
As the bond begin to form (the atoms are getting closer) between the oxygen of the C4-OH and the C1 of the other residue, the bond between the C1 and oxygen in C1-OH begins to lengthen and break. Simultaneously, the electron density of the leaving OH begins to attract (move closer to) the H of the C4-OH (lengthening this bond).
- Show the transfer of the C4 hydrogen to the leaving C1 OH group to form water. The water molecule has a bent geometry (sp3 hybridized with two lone pairs).
- Gradually change the color of the water molecule to differentiate it from the glucose molecules.
Scene #6: Glycosidic bond formation and product separation
The glucosidic bond forms maltose and water is released.
- Complete the formation of the new glycosidic bond between the C1 carbon and the C4 oxygen. Both the C1 and C4 atoms now have tetrahedral geometry (sp3 hybridized).
- Depict the movement of electron pairs with curved arrows: a) From the C4 oxygen to the C1 carbon to form the new glycosidic bond. b) From the breaking C1-OH bond to the leaving OH group.
- Show the water molecule diffusing away from the newly formed disaccharide.
- Adjust the lighting and camera as needed to clearly show the final product.
Throughout the animation, ensure that the bond angles and geometries are accurately represented based on the hybridization state of each atom involved in the reaction. Use smooth transitions between scenes to maintain visual continuity and clarity.
Remember to save your Blender project frequently and render the final animation using appropriate settings for your desired output format and quality.
Step 4: Set Up the World Background
To preview what your environment texture and material settings would look like in a rendered animation without doing a full render:
- Switch to the Layout workspace or any 3D Viewport.
- Change the viewport shading mode to "Rendered" by clicking the rightmost sphere icon in the top-right corner of the 3D Viewport, or by pressing Z and selecting "Rendered".
- Adjust your view to frame the scene as you want it to appear in the preview.
- Set your desired frame range for the animation in the Timeline editor. </aside>
- In the Properties panel on the right, select the globe to view World Properties.
- Under the "Surface" section, click on the "Use Nodes" button if it's not already enabled.
- Change your editor windows to the "Shader Editor" using the icon on the far left (Shader Editor looks like a shiny sphere).
- Just to the right of the editor window icon should be a dropdown that reads “Object,” change it to “World.”
- You should now see the node setup for the World. By default, you'll see two nodes:
- A "Background" node
- A "World Output" node
- If you don't see this setup, or if the nodes are disconnected:
- You can add a Background node by pressing Shift+A, then going to Shader > Background.
- Add a World Output node similarly if it's missing (Shift+A > Output > World Output).
- Ensure the Background node's output is connected to the Surface input of the World Output node.
- You should now see the node setup for the World. By default, you'll see two nodes:
- Add an Environment Texture node (Shift+A > Texture > Environment Texture).
- Connect the Color output of the Environment Texture node to the Color input of the Background node.
- In the Environment Texture node, click the folder icon next to "Open".
- Navigate to Blender's installation directory.
- Once selected, your scene should now be lit by the chosen HDRI.
- Add a Light Path node:
- Press Shift+A
- Navigate to Input > Light Path
- Click to add the Light Path node to your node setup
- Add a Mix Shader node:
- Press Shift+A
- Navigate to Shader > Mix Shader
- Click to add the Mix Shader node to your node setup
- Duplicate the Environment Texture node:
- Right-click on your existing Environment Texture node
- Select "Duplicate" from the menu, or press Shift+D
- Move the duplicated node to a clear space in your node setup
- Connect the first Environment Texture node:
- Find the Color output of the first Environment Texture node
- Connect it to the top Shader input of the Mix Shader node
- Connect the second (duplicated) Environment Texture node:
- Find the Color output of the duplicated Environment Texture node
- Connect it to the bottom Shader input of the Mix Shader node
- Connect the Light Path node:
- Find the "Is Camera Ray" output on the Light Path node
- Connect it to the Fac input of the Mix Shader node
- Connect the Mix Shader to the World Output:
- Find the Shader output of the Mix Shader node
- Connect it to the Surface input of the World Output node
- Adjust the second Environment Texture node for blur:
- Add a Mapping node:
- Press Shift+A
- Go to Vector > Mapping
- Place this new Mapping node before the second Environment Texture node
- Add a Texture Coordinate node (if you don't already have one):
- Press Shift+A
- Go to Input > Texture Coordinate
- Add a Mapping node:
- Connect the nodes:
- Connect the "Generated" output of the Texture Coordinate node to the "Vector" input of the Mapping node
- Connect the "Vector" output of the Mapping node to the "Vector" input of the second Environment Texture node
- Adjust the Mapping node for blur:
- In the Mapping node, find the "Scale" values (X, Y, and Z)
- Increase these values slightly. Start with something like 1.1 or 1.2 for each
- You can experiment with values up to about 1.5
- The higher you set these Scale values, the more "zoomed in" and blurred your HDRI background will appear
- Add a Light Path node:
To keep the original HDRI for lighting while using the blurred version for the background:
This setup uses the first Environment Texture for sharp lighting and reflections, and the second (blurred) one for the background visible to the camera. The Light Path node ensures this separation.
In this folder, you'll find several .exr files. These are Blender's default HDRIs. Choose one, such as "forest.exr" or "city.exr".
Step 5: Rendering the Animation
- Set up your animation timeline:
- Ensure your animation is complete and the desired frame range is set in the Timeline.
- Check that the start and end frames are correct.
- Configure output settings:
- Go to the Output Properties panel (printer icon).
- Set the resolution, frame rate (24 fps), and file format (PNG is recommended for image sequences).
- Choose an output folder by clicking the folder icon next to "Output".
- Adjust render settings:
- In the Render Properties panel (camera icon), set your desired render engine (EEVEE).
- Adjust sample count and other quality settings as needed.
- Render the animation:
- Click "Render" in the top menu, then select "Render Animation".
- Alternatively, use the keyboard shortcut Ctrl + F12.
- Wait for the rendering process to complete:
- Blender will render each frame sequentially and save them to your specified output folder (you have to wait for it to go all the way through).
- Compile frames into a video:
- Switch to the "Video Sequencer" workspace in Blender:
- Import your image sequence:
- In the Video Sequencer Editor, press Shift+A or go to Add > Image/Sequence.
- Navigate to the folder where your rendered frames are saved.
- Select all the images and add.
- Set up your video properties:
- In the Properties panel, go to the Output Properties tab.
- In the Output Properties panel, go to the "Output" section.
- For "File Format", select "FFmpeg video".
- Click on the "Encoding" panel to expand it.
- Under "Container", select "MPEG-4".
- For "Video Codec", choose "H.264" (this is the codec commonly used for MP4 files).
- You can adjust "Output Quality" to your preference. "High Quality" is a good default.
- Choose an output folder by clicking the folder icon next to "Output".
- Export the final video:
- Set your desired frame range in the Timeline editor.
- Go to Render > Render Animation or use the keyboard shortcut Ctrl+F12.
- Blender will process the sequence and save the final video to your specified output folder.
The Learning Process: More Than Just Animation
I was astounded by how many chemistry topics I had to review and subsequently understood better in the process of animating this one reaction in three dimensions.
🧪 We're talking: Anomers vs. epimers and the anomeric effect, Haworth projections and chair conformations, Chirality and cyclization in glucose, Electron density distribution and steric hindrance, Leaving group ability in dehydration synthesis, Hybridization states and orbital interactions, Alpha/beta face nucleophilic attacks, Enzyme selectivity and substrate specificity, Solvent effects on reactivity and the anomeric effect, and more.
3D Animation & Chemistry
This experience convinced me of the immense potential of 3D animation projects to advance chemistry education and research:
- Assign (or co-create) animation projects to reinforce complex concepts
- Create an animation for your talk or paper
- Use already created animations for peer teaching
- Develop visual aids for lectures and online courses
Your Turn to Explore
I've documented my process and am excited to share it with you. Please feel free to ask questions in the comments section below and share any animations you make with the Collective! We'd love to cheer you on.
Stay tuned for more resources!
Off visualizing the abstract,
Vanessa Rosa, Ph.D.
Next: Designing Broader Impacts
Click to Access ➡️About Cuvette Collective:
Cuvette Collective represents a community of educators and scientists dedicated to empowering the societal impact of STEM research. We provide tailored tools, strategies, and insights to help scientists craft authentic, impactful broader impact plans that align with NSF priorities and their research focus. Our engaging blog posts, interactive resources, and personalized consulting services support researchers in leveraging their scientific expertise to make a meaningful difference in society.
How to get involved:
1️⃣ Subscribe to our blog for the latest tips and insights.
2️⃣ Apply to participate in the Broader Impacts Excellence Program.
3️⃣ Inquire about our services to enhance your broader impacts efforts.
We hope you will join our vibrant community committed to reimagining the role of science in society and maximizing the impact of research!







Member discussion